Welcome to the Strategy Guide(s). Your one-stop shop for all your strategic needs.
Below you will find strategies compiled for your use by various users of the online wiki.
Have a strategy to share? Feel free to add it below!
For Pvp guides, go to thePvP Strategies page.
Hull Controlling Guides[ | ]
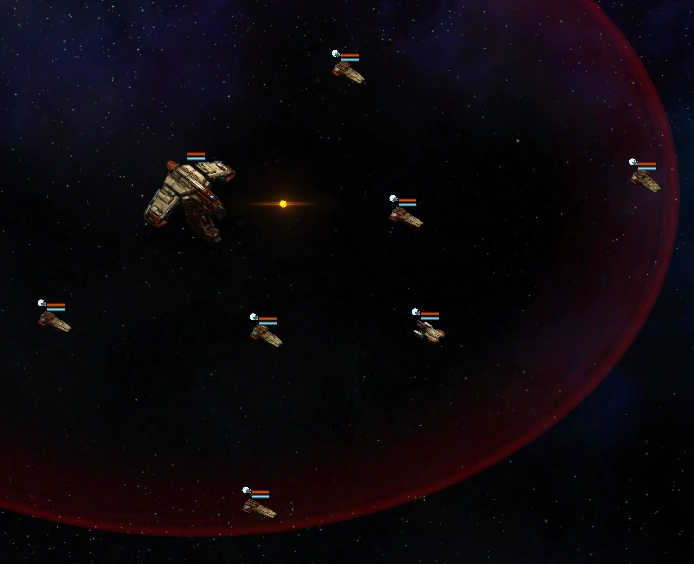
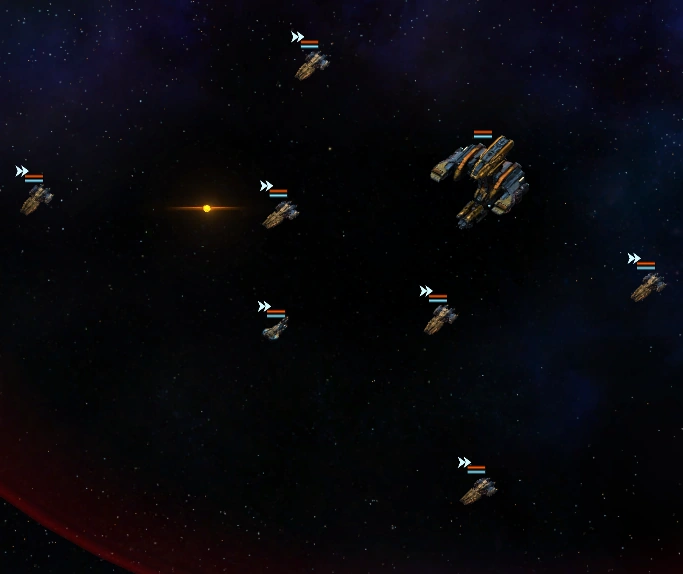
The essential things to know about your ships are their turning speeds, strafing speeds, forward speeds, and turning radius. I would recommend using the first 4 - harriers, longbows, rancors and genesis - in insta rep battles against bases and fleets to learn to control them. There are many tactics that can be used, depending on the situation. Just remember that Destroyer ninjas are for Pros only. It is also important to learn something about hit boxes.
Basic Maneuvers
Waggling
This maneuver is a personal favorite, and rather funny. It works against any projectile armed ship running on a parallel course to you, except destroyers. The problem with closing on Kinetic armed ships is that as you get closer, even with their slow speed, their projectiles start to hit. By moving your ship in a slight zigzag, you can cause these shots to pass through the fuselage of your ship - an area lacking a hitbox - thus avoiding impact
Strafing
Everyone should be familiar with this one - it is a tutorial after all. However, remember - you strafe best at 90 degrees. Be careful when positioning your ships relative to the target - the slow down of a non perpendicular strafe can be fatal.
Spiraling
Useful against all ships with slow turning speed or projectile weapons. The principle is that you place your ship on a course perpendicular to the enemy ship, making yourself a difficult target. However, instead of going in a straight line, you turn your ship slightly inward and slowly circle in on your enemy. This allows you to dodge the projectile weapons of non-destroyers, and helps you flank any ship if they don't realize fast enough.
Paralleling
When fighting non-destroyer ships armed with projectile weapons, it is frequently (though not always) possible to outrun the shots by simply traveling in a straight line parallel to the enemy.
Running
He who turns and runs away lives to fight another day. Know when to fight, and when to withdraw - don't just sacrifice your fleets because you're doing poorly.
Remember - when attacking enemy bases, remember what you see. Some layouts have certain strengths and weaknesses. If you encounter a base which is particularly hard to take out, consider incorporating some of its design features. Also, never just use AI when attacking a base. Your ships don't understand the meaning of 'Don't fly through the terminus mine'.
Battleships - Tactics (pure battlship fleets)[ | ]
Outline of the page[ | ]
The aim of "battleship tactics" is to provide a principle overview of possible tactics, which are commonly used for battleships. The explanation includes ship builds, controlling and the discussion about the enemy typ. The main purpose is clearly for PVE, as PvP enemies usually do not follow any straight tactic or behave expectable. The tactics are often used for farming blueprints and resources. For events, might be that more specialized tactics are useful. As it is supposed mainly for farming, the low-level weapons and own-research technologie is suggest. Ofcourse, by proceeding in the game you will have access to better choices, thus, feel free to improve your fleets with them.
Strafe-back (level 20-40+, without access to carrier, semi-auto)[ | ]
IDEA: You can call this tactic also ... divide and rule ... You turn your battleships orthogonal to the enemies and strafe back. As they will charge forward to you, they will split up in groups due to different velocities and attack ranges. Thus, you can easily one-by-one them and survive with nearly no repair cost. The tactic is best suited for lower level players who do not know good piloting. With further improvement of the items (blueprints/events) the fleet can be evolved to suggest auto-farming fleet by "Manni Gaming"
(see https://www.youtube.com/watch?v=L4VVRjT_gQo)
Suitable Enemy: The most Vega Fleets. The level of the enemy fleet should be lower or similar to the own level. Always useful, if the enemy fleet combines very different kinds of ships.
Non-suitable Enemy: Very inefficient against fast enemies and battalions, they either reach you to fast, or survive to long. You will likely still win it, but have to pay to much for repairing.
Built: Any weapon, which provides a long fire range and high DPS, is useful. Projectiles aren't the best choice due to the low DPS,rather go on Plasma Torpedo , Gladius Driver, HEX Missile or the broadly used Hydra Missile. Of-course, you need strafe thruster, no doubt about that. The shield should be able to survive a lot, as you want to avoid repair costs. Thus, meta-shields are not the best choice, as you will have more durability by standard shields (or you have already the blueprints, which is unlikely). I suggest shockwave, because projectiles can be avoided by strafing and energy weapons have short range and it is assumed that you destroy every ship with energy weapons before reaching the attack range. Regeneration shields are a nice thing, but not the best idea for this setup because you will encounter burst DMG and not distributed DMG over a long time.
Controlling: Very easy, turn by 90° and strafe back. After you killed the fast following group, you will charge the remaining enemies. If they are destroyers, micro-manage your ships by strafing to the sites in order to avoid the projectiles.
Pretend-to-run (Any level Battallion, often used for lvl 27)[ | ]
IDEA: My personal favorite. You use a long range weapon and navigate in such way, to get the followers in fire range, but far enough to be safe. Thus, you win without repair costs.
Suitable Enemy: Mainly battalions, also some levels above your own. All other fleets can contain enemy types, which will cause some trouble. But, if they are lower in level you will still win easily. The tactic is broadly used for farming crafting materials on high-level battalions. Lvl 27 battallions are the easiest enemy you can wish for, once they are following you, they have no chance to hit you due to their weapon built.
Non-suitable Enemy: PvP ... no player will be stupid enough to be fouled by this tactic. Fast PvE ships, especially with a certain durability ... thus cruisers can be a pain. Cutters and destroyers are possible but only on low level.
Built: Kinetic weapons are the key point here. You use the weapon with longest range, neglecting DPS and velocity. You need at least one additional weapon with shorter range auto-aim or large scattering. The thruster should be fusion, if already achieved. Else go for rear, as you need to ensure to keep the enemies behind you.
Often it is sufficient to have only 1 battleship as the fleet, because it makes the controlling easier. More ships decrease the time to your victory, but shouldn't influence the result.
Controlling: In the beginning turn by 60-90° and fly away, the fastest ship will follow you, which you directly knock out with 1 or 2 shoots. If the enemy fleet is not a battalion, this phase is the most critical one, because you need to destroy the fast enemies before they come behind you (out of fire range) and can easily shoot-you-down. Afterwards, you turn in such way that the enemy is behind you, but at the corner of your attack range. Your projectile weapons will fire on him and miss him. But, they hit the following group and destroy thus ship by ship. When only one enemy is left, turn by and bring the short (auto-aim/scatter) weapon in attack range. Depending on the built of the enemy ship, you can suffer some DMG in this phase only, but with micro-management you will still be fine.
Charge-through (Mid Level Players)[ | ]
IDEA: Calling that a tactic is somewhat hilarious, as the main idea is to make your fleet as durable as possible, put a lot of DPS and then ..."THIS IS SPARTA !". Often, you use this technic for auto-fleets, which you manually control in order to avoid high repair costs. Some people claim that a standard technique ... My opinion: everybody should be happy in his own way ...
This tactic is clearly the less advanced tactic and will (in worst case) have completely no demand for micro-management. Thus, every double-left-handed micro-management idiot, without any better idea and a lack of restraint will be happy with it. I can tell that by experience ;)
Side remark: This tactic is similar to the "high-durability-fire-power cruiser fleets", e.g., the exodus with double shields. The cruisers are faster and better to navigate, but have less armor and fire-power on the same level. I never tested it by myself, but I heared quite optimistic feedbacks from other players. Might be worse trying...
Suitable Enemy: All fleets with lower level (blueprint and resource farming). Sometimes, in events (e.g. riot), I saw people charging higher level fleets and forcing thus repair costs, because the exponential growth of xp per level probably make it more efficient. I can not judge on that, might be ...
Sometimes similar builds are used for base rushing, however, as above .... might be
Non-suitable Enemy: Basically the most fleets are okay, but never perfect. Repair costs are usually rather level dependent than fleet type dependent. Fastly navigating destroyers (higher attack range + slightly faster) can be a hard task. Battalions will cause higher repair costs due to similar durability and fire power.
Built: The BEST you have, doesn't matter of what. Usually your research level and blue prints predict your choice !!! You can go for high DPS energy weapons, but long-range, fast ships will be then a problem. I suggest scatter or hydra missiles as a trade-off, maybe creeper or torpedoes. For thruster go on fusion, if you have it in a good level, else go for rear thruster, because charging doesn't need navigation. Shields define, like weapons, which are good and bad enenmies for you. If you have recharging shields, long fights are your strenght, and thus low DPS fleets. If you have high durability shields you go for high DPS-burst fleets (other rushing fleets are the perfect example).
Controlling: Nomen est omen. Depending on the the enemy it can be usefull to surround him, to charge through the middle or to just fly-by. But this is rather a question of your micro-management skills, and thus you need to test it by yourself.
Instant-repair Fleet (rancor, level 20-32)[ | ]
Idea: As you see by the name, this "tactic" is rather a built, as it do not ask for a special piloting. This can be done with rancor battleships (strongest choice in my opinion) but also with other ships (frigates up to talon, Genesis cruiser, destroyers up to Broadsword). The core idea is to keep the sum of health and shield below 300. Consequently, every ship will be repaired in less than 5min, which you can even "instant". The weapons, thruster, special etc have no influence and can be choosen freely.
Suitable Enemy: Basically all fleets with the same level or below. The level will be mainly defined by the weapons you put to them. I even use it as a "pre-fleet" to level 40+ vega cargo fleets. The purpose of the rancors is to vanish all the fast/small ships. After the instant fleet is destroyed, I go in with a lvl 38-42 venom fleet with "strafe-back" semi-auto tactic, causing me only the instant repair cost as the venom usually survive with no (or at least nearly no) damage.
Non-suitable Enemy: Very fast ships and destroyers can out-piloting you. But who cares, it is instant repair ...
Built: As aformentioned, health+shield must stay below 300. Thus plate steal 2 or 3 is fine in combination with eiter meta-phase shields I or blast shield I. I prefere blast shield, as it recharges. On the other hand, the resist of meta phase shield allows for more damage reduction. In a normal fleet, you would go for high shield values in order to keep the chance for damaging the hull low. But its instant repair, you dont care ;)
Summarizing, if you "charge through" the enemy with your fleet, you have no time for recharge, thus meta is better. If you "strafe back", you can recharge, likely blast shields will be better. The weapons can be choosen freely, and any other tactic can be combined to that built. Usually, hydra missiles are prefered due to the aim-lock. If you dont have them, scatter missiles are a nice thing (early researched and moderate dps with high propability of hitting). You can also mix them up, I usually put 1 mass driver, 1 thermal beam, 2 hydras. Because I mix the weapon types, I dont use any specials but cargo instead.
Controlling: You can use the auto mode, its okay and you will usually be victorious against fleets of same level or up to +2. You can improve the defeatable fleet level by manual piloting with some other tactic (e.g. strafe back, charge, ...)
Side remark: It is common, after you leave this level range of instant rancors, to keep some and combine them with other (well-equipped) ships. This built offers you some "decoys" or "shields" for the good ships, keeping the repair time of the fleet low.
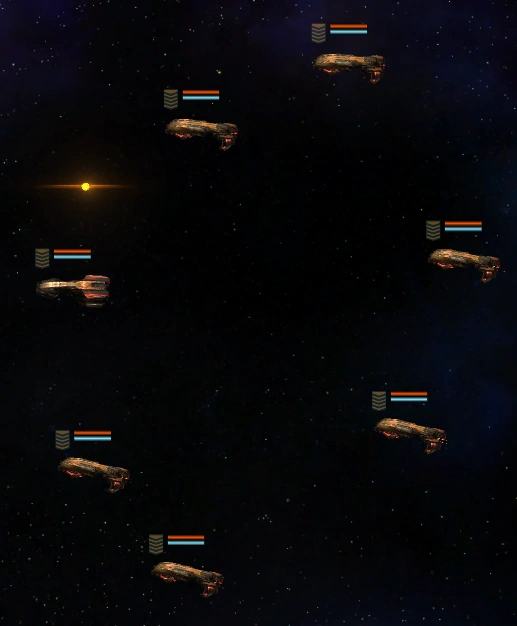
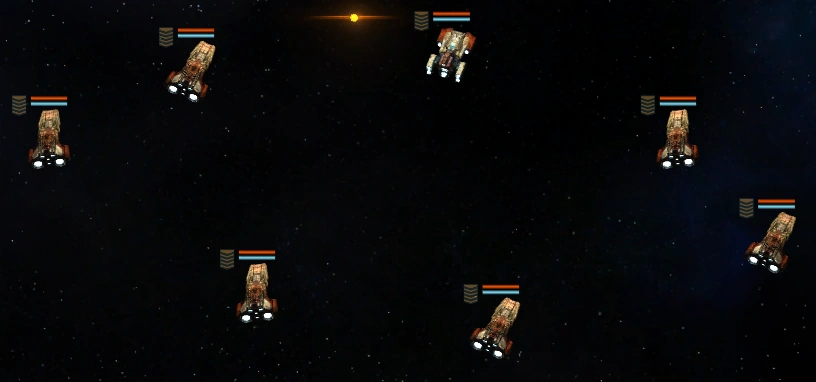
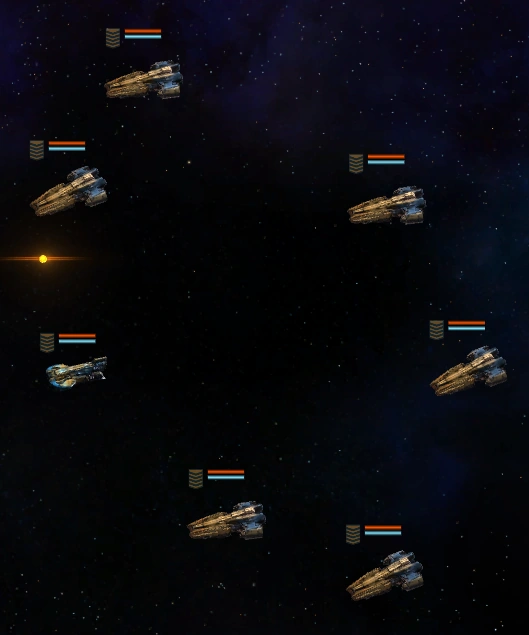
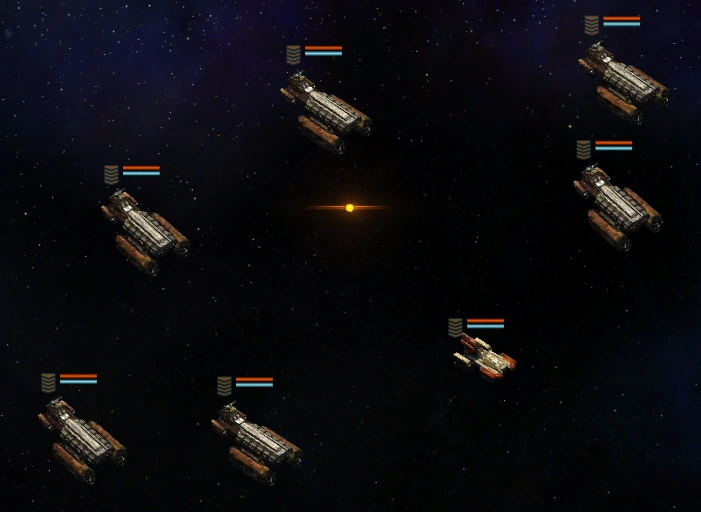
Crafting Material Fleets[ | ]
Crafting Material Fleets consist of 5 varieties that follow a general formation setup.
Each fleet type with the exception of hunters, consists of 6 identical ships, with a 7th lead ship in front.
Hunters consist of 5 identical cutters with two battleships and a carrier, making them considerably more dangerous then other crafting material fleets.
These fleets can also be found in a supply run variation, which is virtually identical in appearance to the original versions, but with the addition of a carrier supporting the fleet, making them overall more difficult, but rewarding due to the guaranteed strongbox drops.
Below you will find strategies for each individual fleet in the crafting material fleet list. You will NOT find Supply Run Fleet Strategies here. See the Supply Run Strategies Section for that.
Scouts[ | ]
Scout Fleets consist of glass cannon frigates, which are quite fragile but have serious firepower.
These frigates have an 80% resistance to stasis weaponry and deal 200%/100% extra damage to destroyers and battleships.
Cruisers at first are the best way to defeat scout fleets, however once you get access to Rancor Battleships and Gladius Drivers, battleships become the most efficient way of destroying them, even to the point of defeating them without taking ANY damage.
Rebel Scouts (13)[ | ]
| “ | A Rebel Detachment designed for scouting distant sectors and disposing of slower, cumbersome ships. Utilize armored cruisers to take them out. | ” |
| — Strategy Guide Description |
It may not look like much, but this fleet is to be feared. It's firepower is considerable, especially for such a low level.
It is highly advised that newer players avoid attacking these fleets until you have researched the Genesis Cruiser, as well as Shockwave Shields and Pulse Ray V. Without this technology they are capable of annihilating just about any fleet you could throw at them from the current tier.
However, typically by that point you will have fleets capable of defeating the raider and battalion fleets which have much better resource payouts and drop chances for strongboxes. Attacking these fleets are generally not worth your time and resources.
HOW TO COUNTER: Genesis Cruisers are the prime counter to this fleet. They have enough durability and mass to support proper shielding which will allow them to survive the onslaught long enough to destroy the opposition.
RECOMMENDED STRATEGIES: A fleet of Genesis Cruisers equipped with Pulse Ray V or Disruptor Ray III are capable of defeating this fleet extremely quickly and easily.
Rebel Scouts (23)[ | ]
| “ | An upgraded Rebel Scouting Detachment better optimized for moving through enemy territory. Utilize Exodus Cruisers to defeat them. | ” |
| — Strategy Guide Description |
This fleet is an upgraded version of the level 13. The firepower of the frigates have gone up exponentially, making them lethal to tier 1 hulls and dangerous to tier 2 hulls.
At this tier, you should have at least the Exodus Cruiser and a few blueprint weapons, such as the Thermal Beam, Hydra Missile, or Gladius Driver.
HOW TO COUNTER: There are two options to counter this fleet depending on your available technology. Your first option is to use Exodus Cruisers with shockwave shielding and powerful energy weapons to simply outlast the damage. Your second option is to use Rancor Battleships with long-range projectile weapons to destroy them before they can even get within range.
RECOMMENDED STRATEGIES: 6 Rancor Battleships equipped with Gladius Driver I x4 and Shockwave Shield II is capable of taking out the entire fleet without taking ANY damage, as long as you turn your ships at a 90 degree angle and strafe backwards.
6 Exodus Cruisers equipped with Disruptor Rays or Thermal Beams can also easily defeat this fleet, albeit with repair times as a result.
Rebel Scouts (33)[ | ]
| “ | An extremely aggressive and powerful iteration of the Rebel Scouting fleet designed to invade enemy sectors. Deploy Revelation Cruisers to dispose of them. | ” |
| — Strategy Guide Description |
This fleet is an even stronger version of the level 23, now with godly firepower. It is suicide to engage at close range in most cases, however it is easy to defeat as, by this tier you should have access to the powerful Gladius Driver, which if used on Rancor Battleships. Allows you to destroy them without taking any damage in return.
If you are intent on using cruisers against them, then you will want to use the Revelation Cruiser. It can support much thicker shields and mitigate repair time.
HOW TO COUNTER: Rancor Battleships with Gladius Drivers are your best counter, you can also use Revelation Cruisers with thick shockwave shields.
RECOMMENDED STRATEGIES: 6 Rancor Battleships equipped with Gladius Driver I x2 and Gladius Driver II x2, with a Shockwave Shield II can defeat the entire fleet without taking any damage in return. Turning to a 90 degree angle and strafing backwards will allow this strategy to be executed flawlessly.
V-SEC Scouts (50)[ | ]
| “ | A V-SEC Overwatch Detachment designed to intercept Rebel Artillery and Battalions. Utilize Revelation or Apocrypha Cruisers to best them. | ” |
| — Strategy Guide Description |
V-sec Scouts (50) are a force to be reckoned with. Mark V Eagle Frigates armed with Vector Torpedoes will quickly rip apart most any opposition that is foolish enough to get within range. Unlike the rebel scouts, V-sec scouts are actually quite dangerous to cruisers, rendering the close-up brawl method suicide.
Thankfully, they suffer from weaknesses similar to their rebel counterparts, they can be kited by battleships, unfortunately these scouts boast much thicker armor compared to their cousins, though it is fairly low when comparing to ships of the same tier, it makes it very difficult to take them out before they can get into range.
Because of this, a carrier utilizing the Agility Field is all but necessary to defeat them. Preferably the Ragnarok Carrier for the extra firepower, although a Midgard Carrier can suffice if you lack the rag.
HOW TO COUNTER: Like before, cruisers are naturally the best counter against frigates. However, in the case of V-sec Scouts, battleships are the way to go. Do not attempt to defeat this fleet if you lack a Midgard or Ragnarok, as the agility field is absolutely necessary to ensure your battleships stay out of range of the enemy vectors. It is advised to use Fury Battleships or better, due to their superior firepower. You can also use Venom Battleships if you do not have the fury.
RECOMMENDED STRATEGIES: one Ragnarok Carrier/Midgard Carrier with an escort consisting of at least five Fury Battleships or Venom Battleships. Equip these battleships with Vector Torpedoes due to their heavy damage output, long-range, and homing capability.
Volatile Fuel is an extremely beneficial boost to place on your battleships for this, as it will drastically speed up the torpedoes and inflict greater splash damage, destroying the fleet quicker in turn. You can use AM Warheads as a substitute if you do not have volatile fuel.
You may use any squadron you like on your carrier, although it is recommended to use Bomber Squadrons because of their extreme firepower.
Artillery[ | ]
Rebel Artillery (10)[ | ]
| “ | A Rebel Destroyer Armada designed to obliterate cruisers at a great distance. Utilize Harrier Frigates to take them down. | ” |
| — Strategy Guide Description |
A long-range bombardment fleet consisting primarily of Trident Destroyers. They are very dangerous to Genesis Cruisers, as they not only significantly out-range them, but also inflict a bonus 200% damage against cruisers in general. They are however extremely weak to practically any other ship, especially Harrier Frigates.
These mark V destroyers also boast a significant 25% damage phasing on their projectile slugs, causing a hefty chunk of their damage to be dealt against armor instead of shields. However this tends to barely be noticed unless the target is a cruiser.
HOW TO COUNTER: Frigates are the general counter to destroyers. They are much faster then destroyers and have the agility necessary to dodge incoming projectiles. When marked up they also inflict much greater damage to said ships. You can generally use most any ship to counter this fleet as they are extremely weak, however genesis cruisers are unadvised.
RECOMMENDED STRATEGY: A fleet of 6 Harrier Frigates armed with Disruptor Rays, Rail Drivers, or Scatter Missiles will be sufficient to defeat this fleet. No piloting will be necessary. It is recommended to use Deflector Shields to mitigate incoming projectile damage.
Rebel Artillery (30)[ | ]
| “ | A specialized fleet of Tridents optimized to single out and obliterate Rebel Exodus Cruisers. Talon Frigates will make short work of them. | ” |
| — Strategy Guide Description |
The second iteration of the Rebel Artillery. The level 30 variant proves to be a stronger opponent then it's pathetic level 10 sibling.
Despite having an abysmal damage output compared to the VEGA Artillery, it cannot be stressed that these destroyers will tear apart Exodi Cruisers in seconds. And are even capable of inflicting heavy damage to Revelations.
However, they are very fragile and will go down quickly to concentrated fire, especially when attacked by Talon Frigates.
HOW TO COUNTER: Talon Frigates are the best counter to this fleet when marked up to III, despite only being a Tier 2 hull, they are more then a match for these destroyers.
RECOMMENDED STRATEGIES: 6 Mark III Talon Frigates armed with Gladius Drivers are more then capable of obliterating this fleet. It is recommended to utilize the Deflector Shield or Repulsor Shield to mitigate damage, while also allowing you to have instant repair. You may also utilize Rear Thrusters if desired in order to speed up the combat and mitigate stasis further.
VEGA Artillery (37)[ | ]
VEGA's own Artillery Detachment is not to be taken lightly. As these destroyers are capable of annihilating even Revelation Cruisers.
Six Scythe Destroyers armed with the fast and deadly Gladius Drivers are capable of dishing out heavy damage onto a single target, and will outright tear cruisers to shreds. They are also fairly well armored and shielded compared to their rebel cousins.
However, despite this, it is possible to defeat them by utilizing the Talon Frigate, a full fleet of them with the right weaponry can defeat this fleet easily.
HOW TO COUNTER: Frigates are your best counter here, specifically the Talon Frigate. Not only because it can fight with instant repair, but also because it inflicts 130% bonus damage to destroyers and comes with a 40% stasis resistance. Nighthawk Frigates are deadly to this fleet when fully marked up, however, unlike the talon, you are bound to suffer repair time due to the fact that nighthawks are not capable of being instantly repaired when destroyed.
RECOMMENDED STRATEGIES: Six mark III Talon Frigates armed with Gladius Drivers are enough to defeat this fleet. You can also utilize mark IV Nighthawk Frigates equipped with weapons such as the Gladius Driver, AP Driver, Hydra Missile, or Vector Torpedo, generally most weapons on a mark IV nighthawk will tear this fleet apart.
V-SEC Artillery (53)[ | ]
| “ | V-SEC's Lance Destroyer Detachments are designed to wipe out entire fleets of Revelation Cruisers. Deploy Nighthawk Frigates to take them down. | ” |
| — Strategy Guide Description |
(W.I.P)
Raiders[ | ]
Rebel Raiders (15)[ | ]
| “ | A Rebel Cruiser Detachment designed to wipe out vulnerable frigates. Deploy Longbow Destroyers or Rancor Battleships to take them out. | ” |
| — Strategy Guide Description |
Rebel Raiders (15) are an extremely weak cruiser fleet, with multiple methods of combat applicable to destroy them. Even Harrier Frigates can take them out.
These cruisers are equipped with the Thermal Beam, despite this however the damage potential of a single cruiser is laughable. Be aware that most tier 1 ships will be destroyed fairly quickly if all 6 cruisers focus fire on it. However the chances of this occuring are semi-rare.
Due to their mark V status, they inflict a moderate 50% bonus damage to frigates and cutters. While this is not particularly high, it is still worth keeping in mind.
HOW TO COUNTER: Destroyers and Battleships are the best counters against raiders. Their superior range, coupled with their heavy damage bonus to cruisers when marked up, makes them lethal against these fleets. Longbow Destroyers and Rancor Battleships should be used here, however just about any ship can destroy them due to their poor firepower.
RECOMMENDED STRATEGIES: A fleet of 6 Longbow Destroyers or Rancor Battleships armed with Pulse Rays or Disruptor Rays are capable of out-brawling these cruisers and rapidly destroying them as they get close.
Below Strategy supplied by Alias3002.
There are many ways to take out these fleets - just about any group of ships harrier and up protected by Spectral shields and armed with Pulse Rays or better (in DPS) can win on autopilot. My particular favorites are fleets of 6 genesis or rancor Mk II, either insta reps or with spec shield II and Pulse Ray V or better. No Kinetic though! These fleets are also effective against the supply run Raider fleets, and the Genesis fleet (insta rep) can take out Rebel Raiders (13) with relatively minor damage. Additionally, the Genesis insta rep is generally useful. Fun fact: the Genesis cruiser Mk II defies the 300 rule - equipped with Tritanium I and Spectral Shield I, its total amounts to 305, but it is still precisely 5 minutes repair time - true insta. Someone please make this more formal :P.
Rebel Raiders (20)[ | ]
| “ | A more powerful fleet of Cruisers, better suited to take on the Rebel Talon Frigate, Utilize Broadsword Destroyers or Venom Battleships to wipe them out. | ” |
| — Strategy Guide Description |
Rebel Raiders (20), while only a 5 level difference, is a significant difference from the level 15.
Unlike the previous Rebel Raiders, these cruisers now actually pose a significant threat to frigates.
Boasting thicker shields, heavier armor, and stronger Thermal Beams, Rebel Raiders (20) will give you a run for your lower-level money.
By this point however you should have access to at LEAST the Broadsword Destroyer, making destroying these fleets a breeze.
HOW TO COUNTER: As with before, destroyers and battleships are the best ways to take out cruiser fleets. Due to their higher range and their massive damage modifiers against cruisers when marked up. Unlike the previous fleet, which could even be defeated with Harrier Frigates, you should NOT use frigates to take on this fleet.
RECOMMENDED STRATEGIES: A fleet of six Mark III Broadsword Destroyers equipped with a weapon that is not Explosive can defeat this fleet. Due to receiving a 150% maximum range increase on all equipped weapons and inflicting a massive 130% bonus damage against cruisers. A fleet of six Mark III Venom Battleships equipped with Gladius Drivers will easily overpower this fleet.
If you do not yet have access to the Venom Battleship, you can utilize Rancor Battleships equipped with Gladius Drivers as a substitute.
Below Strategy supplied by Alias3002.
The above description of this fleet should be taken very literally - it is virtually a clone of Rebel Raiders 15, but with better shields, armor, and especially weaponry. They can pose a significant threat to insta-reps if they get close. When engaging, either use manual control to keep your distance, or use heavy brawlers of significantly higher level.
Rebel Raiders (25)[ | ]
| “ | A fleet designed to tackle entire fleets of Talon Frigates, utilize Broadswords and Venoms to defeat them. | ” |
| — Strategy Guide Description |
A fleet nearly identical to the level 20 variation, but stronger.
This fleet is generally the same as Rebel Raiders (20) in terms of it's durability and firepower. However this fleet has slightly thicker armor and stronger shields, as well as slightly more powerful weapons, making them more of a threat.
Like the previous fleet, Broadsword Destroyers will annihilate them.
HOW TO COUNTER: Broadsword Destroyers and Venom Battleships are your greatest allies here. Utilizing projectile and energy weapons, they can rip this fleet apart almost as effortlessly as they obliterate the level 20.
RECOMMENDED STRATEGIES: six Mark III Broadsword Destroyers or Venom Battleships utilizing a projectile or energy weapon will make short work of this fleet. Utilizing the Thermal Beam or Gladius Driver tends to make the most promising results here.
Rebel Raiders (35)[ | ]
| “ | A pack of Revelations built to take on Nighthawk Frigates and Taipan Cutters. Utilize Trident Destroyers and Fury Battleships to take them out. | ” |
| — Strategy Guide Description |
The strongest iteration of the Rebel Raiders. They now have the durability and firepower to overwhelm Talon Frigates and even compete with Nighthawk Frigates.
However, at this stage, there are numerous ways to render this fleet almost harmless.
One can utilize the Tier 2 Broadsword Destroyers and even Tier 1 Rancor Battleships to destroy this fleet.
HOW TO COUNTER: Broadsword Destroyers are arguably the best counter here. As they can out-range these cruisers at greater distances then the Venom can, and with their massive damage bonus, can dish out even greater damage. You can also utilize the Trident Destroyer, which will completely obliterate these cruisers. However, the lack of an instant repair possibility makes them more costly to use.
RECOMMENDED STRATEGIES: 6 Mark III Broadsword Destroyers utilizing Thermal Beams or Gladius Drivers are more then capable of taking out this fleet. With instant repair as well, making them a very popular choice.
You can also utilize six Mark II Rancor Battleships equipped with Gladius Driver I x2 and Gladius Driver II x2, strafing backwards at a 90 degree angle. It is recommended to use Strafe Thruster III for this strategy.
VEGA Raiders (40)[ | ]
| “ | VEGA's very own Apocrypha Raiders are built to annihilate fleets of Nighthawks and Taipans. Utilize Tridents or Furies to defeat them. | ” |
| — Strategy Guide Description |
VEGA's Apocrypha Raiders are a force to be reckoned with.
Compared to the Rebel Raiders, these cruisers are not as powerful when attacking targets individually, however they make up for it with their sheer power when taking out groups of ships, and can even overwhelm a single ship if all six attack at once.
These raiders are FAR more durable compared to the rebel raiders, making them very dangerous to engage at close range.
Thankfully, being cruisers, they have no stasis resistance, allowing one to kite them. Attempting to out-brawl them is unadvised.
HOW TO COUNTER: Destroyers and Battleships will inflict heavy damage on these raiders. Trident Destroyers and Fury Battleships are your most effective counters here. However, it is possible to defeat the entire fleet with a single Venom Battleship if fully marked up, equipped with Fusion Thrusters III, with long-range weaponry and utilizing at least NET Torpedo II.
RECOMMENDED STRATEGIES: It is entirely possible to defeat this fleet with a single Venom, however doing so may be difficult for the inexperienced. Fleets of Trident Destroyers and Fury Battleships armed with projectile or energy weapons are capable of defeating this fleet. Focused Optics is a very important boost to utilize in the case of energy weapons, as you will need it to ensure you get the first shot off.
Iron Star Raiders (60)[ | ]

Use Mark V battleships with Aurora rays and a Ragnarok. They are easy to kill that way
Battalions[ | ]
Rebel Battalion (17)[ | ]
| “ | A large fleet of Fury Battleships threaten to destroy any cruisers unfortunate enough to find themselves on the broadsides. Utilize Harrier Frigates to take them down. | ” |
| — Strategy Guide Description |
Rebel Battalion (17) is widely considered to be among the easiest fleets in the game to defeat.
At first glance, the battalion appears fearsome. Fury Battleships practically out-size everything you have at this point. Dwarfing the Rancor Battleship by a great margin.
However, this size will mean little to you as you quickly learn just how easy it is to dodge the Mass Driver slugs coming off of these ships. While they are mag boosted, they are laughingly easy to avoid by just about any moderately fast ship.
One should never forget however that if all 6 slugs DO connect, that the damage inflicted will be fairly decent for a ship of this tier. As such, it is important to remain agile.
HOW TO COUNTER: Frigates and Cutters are the most direct counter to the battleship. In the case of frigates, they have the maneuverability to completely dodge projectile arrays and render them harmless, while simultaneously boasting enough speed to close the distance. Cutters on the other hand, with heavy armor and powerful weapons, can bum-rush most battleships with successful results, albeit taking heavy damage in the process. At this stage Harrier Frigates will be your best counter.
RECOMMENDED STRATEGIES: A fleet of 6 mark II Harrier Frigates armed with Disruptor Rays, Gauss Drivers, or Scatter Missiles are capable of defeating this fleet relatively easily. It is recommended to utilize the Deflector Shield to mitigate incoming damage.
It is also not advised to utilize projectile weapons if you lack the Iridium Magnets boost. You should always utilize Mark II at least to achieve a sizable velocity boost.
Below Strategy supplied by Alias3002.
Simultaneously one of the easiest and most difficult fleets to eliminate. The projectile-armed battleships are even a threat to ships with deflector shielding, due to their sheer broadside power, but the biggest threat is the frigate. Unless eliminated immediately, it can easily drain deflector shielding, leaving the ships open to attack. However, once this threat is neutralized, the rest of the fleet is something of a cakewalk. Just don't fly through the projectile fire.
Rebel Battalion (27)[ | ]
| “ | A Fury Fleet designed to assault Cruiser Detachments with powerful weapons. Utilize Talon Frigates to take them out. | ” |
| — Strategy Guide Description |
Rebel Battalion (27) is a moderate step-up from the level 17 iteration. The furies are much stronger and prove to be more durable then before.
Their Mass Driver arrays are much more powerful then before, causing direct hits to inflict much greater damage. This becomes very dangerous against cruisers, particularly the Exodus Cruiser.
Despite this however, there is no change to the fact that their mass drivers can be easily dodged. A fleet of Talon Frigates can annihilate them, and they can be effortlessly kited by a single battleship, preferably a Venom Battleship.
HOW TO COUNTER: At this stage, you should have access to the Talon Frigate, which will be more then enough to defeat this fleet. You can also use Taipan Cutters if you have them, but it is generally more efficient to use Talon Frigates with instant repair. You can also kite this fleet with a single Venom Battleship, preferably armed with the Vector Torpedo.
RECOMMENDED STRATEGIES: A fleet of six Mark III Talon Frigates equipped with Gladius Drivers will completely obliterate this fleet on full-auto.
A single Venom Battleship equipped with at least Fusion Thruster II and Vector Torpedo I can solo this fleet if you manually pilot it away from the fleet, utilizing the very edge of the firing arc to launch torpedoes.
VEGA Battalion (45)[ | ]
Vega Battalion (45) is a widely feared fleet, renown for it's massive firepower and high durability.
Six mark V Dread Battleships armed with the Gladius Driver make up the majority of this fleet. What separates this fleet from the rest of the battalions is that the gladius driver has a proximity detonation, making it that much harder to take them down.
To make matters worse, they are much faster then other battalions, having a forward speed identical to that of a frigate.
They inflict tremendous damage with just one ship alone, a full barrage from all 6 battleships can annihilate most any ship, especially cruisers.
Thankfully, it is possible to kite them without taking damage if one is smart with their flying.
HOW TO COUNTER: Despite frigates being the general battleship counter, you should NOT use them here. The sheer damage of the gladius drivers will quickly overpower frigates, and if you do survive you will suffer costly repairs. You have two options:
Use a single Venom Battleship, or utilize a Carrier.
RECOMMENDED STRATEGIES: one Venom Battleship armed with Vector Torpedoes and Fusion Thruster III can kite this battalion without any damage in return if you are careful with your piloting and utilize the very edge of your firing arc. You can also equip a NET Torpedo if you are unsure, at the cost of DPS.
You can also utilize any carrier that is not a Midgard Carrier, however due to the battleships speed, it is unlikely you'll be able to take them down fast enough before they enter firing range. Stasis escorts would be advised in this case.
V-SEC Battalion (55)[ | ]
(W.I.P)
Iron Star Battalion (63)[ | ]

(W.I.P)
Hunters[ | ]
Iron Star Hunters (65)[ | ]
| “ | The Iron Stars very own Python Cutter Hunters are built to run down any opposition. Utilize Apocrypha Cruisers, or Corinthian Cruisers to take them out. | ” |
| — Strategy Guide Description |
(W.I.P)
Supply Run Fleets[ | ]
Supply Run Fleets consist of 5 primary varieties that follow a similar format to the original crafting fleets.
There do however, exist 4 unique varieties as of late which are unique to the Iron Star Company and Demon Corps Only.
Supply Run Fleets primarily consist of 6 identical ships with 1 ship in the lead and a carrier following behind.
Hunter Supply Runs are identical to the regular Hunter Fleets, the only difference being that Supply Runs make other variations of the Hunter Fleets available to attack.
Supply Runs are unique in that their fleets drop GUARANTEED Strongboxes towards specific ships upon their defeat, as long as you do not draw. They are commonly farmed for upgrade materials.
Scout Supply Runs[ | ]


Scout supply runs are characterized by the image of a Condor Frigate firing what appears to be Gladius Drivers.
These supply runs tend to be more annoying compared to the others, primarily because the carriers that accompany these supply fleets have a scramble range that is far beyond any other, able to encompass the entire screen and then some.
Scout supply runs introduce a new variety of scout fleet, known as the VEGA Scouts. Which only appear during these supply runs.
SCOUT-CLASS supply runs drop strongboxes for the Harrier Frigate, Talon Frigate, Nighthawk Frigate, Condor Frigate, Eagle Frigate, Hurricane Frigate, and some time in the future, will drop strongboxes for the Tornado Frigate.
Rebel Scouts (15)[ | ]
Rebel Scouts (25)[ | ]
| “ | Rebel Nighthawks escorting a Valhalla loaded with Talon Frigate Materials, raid them with Exodus Cruisers and take what belongs to us! | ” |
| — Strategy Guide Description |
Rebel Scouts (33)[ | ]
VEGA Scouts (40)[ | ]
| “ | VEGA Condor Frigates guiding a Ragnarok loaded with Condor Materials safely across the sector. Invade their privacy with Revelation Cruisers and raid those materials! | ” |
| — Strategy Guide Description |
V-SEC Scouts (53)[ | ]
| “ | A fleet of Eagle Frigates protecting a Valkyrie Carrier, assault their transport with Apocrypha Cruisers and take the Eagle Materials for yourself! | ” |
| — Strategy Guide Description |
Artillery Supply Runs[ | ]


Artillery supply runs are characterized by the image of a Lance Destroyer, exiting a wormhole.
These supply runs are considered to be one of the easier runs to complete. This is because of how simple it is to decoy the destroyers, or outright kite them with a carrier. Care should be taken however as they still inherit their heavy damage output at the higher levels.
They introduce a mid-tier variant of the Rebel Artillery fleet.
ARTILLERY-CLASS supply runs drop strongboxes for the Longbow Destroyer, Broadsword Destroyer, Trident Destroyer, Scythe Destroyer, Lance Destroyer, Machete Destroyer, and Damocles Destroyer.
Rebel Artillery (15)[ | ]
| “ | A detachment of Trident Destroyers keeping a Valhalla Carrier under close watch. Snatch the longbow materials! | ” |
| — Strategy Guide Description |
Rebel Artillery (25)[ | ]
| “ | A fleet of Trident Destroyers protect a Valhalla with their long-ranged weapons. Do what it takes to rid them of their broadsword materials! | ” |
| — Strategy Guide Description |
Rebel Artillery (33)[ | ]
| “ | A group of Trident Destroyers have a keen eye on their Valhalla Carrier. Catch them by surprise and raid the trident materials! | ” |
| — Strategy Guide Description |
VEGA Artillery (40)[ | ]
| “ | A large fleet of Scythe Destroyers defend a Ragnarok Carrier from the clutches of the rebels. Show them you are superior and take their scythe materials! | ” |
| — Strategy Guide Description |
Vsec Artillery (53)[ | ]
| “ | A dangerous platoon of Lance Destroyers obliterate all in their path to defend a Valkyrie Carrier. Outsmart them and obtain the lance materials! | ” |
| — Strategy Guide Description |
Raider Supply Runs[ | ]

Raider supply runs are characterized by the image of a Revelation Cruiser, putting distance between it and a wormhole with multiple Dread Battleships and Condor Frigates in hot pursuit.
These supply runs tend to take longer to defeat compared to other supply run fleets. This is because of the high durability of the cruisers within. It is also advisable to note that although they are easily kited, care must be taken to avoid close combat with them at all costs.
Raider supply runs introduce a weaker variation of the VEGA Raiders which appear in planetary orbit, which supply strongboxes for the Destiny Cruiser. They also introduce a V-Sec variant of Raiders.
RAIDER-CLASS supply runs drop strongboxes for the Genesis Cruiser, Exodus Cruiser, Destiny Cruiser, Revelation Cruiser, Apocrypha Cruiser, Corinthian Cruiser, Heretic Cruiser, and Covenant Cruiser.
Rebel Raiders (15)[ | ]
| “ | A fleet of Revelation Cruisers escorting a Valhalla Carrier through planetary orbit. Take their genesis materials! | ” |
| — Strategy Guide Description |
Rebel Supply Raiders (15) are identical to Rebel Raiders (15), but with the addition of a Valhalla Carrier.
Their firepower and durability are rather pathetic for their tier, making them easy to destroy with most fleets.
The carrier will prove a unique opponent for newer players, but is easy to defeat.
HOW TO COUNTER: Battleships or Destroyers are your best counters here. Longbow Destroyers in particular can be very powerful as they deal 100% more cruiser damage when marked up. Rancor Battleships can also suffice as they deal 10% more damage to cruisers and have more raw firepower then destroyers.
RECOMMENDED STRATEGIES: A fleet of six Longbow Destroyers equipped with most lower level weapons can easily take on this fleet. They do not even have to be marked up, though having them marked up speeds up the process. You can also use Rancor Battleships equipped with powerful energy weapons to shred this fleet easily.
VEGA RAIDERS (25)[ | ]
| “ | An interesting sight, VEGA Apocrypha Cruisers escorting a Ragnarok Carrier to a planetary station, intercept them and raid the destiny materials! | ” |
| — Strategy Guide Description |
VEGA Supply Raiders (25) is identical in appearance to VEGA Supply Raiders (40), but with a few key differences.
Compared to the (40), these Apocrypha Cruisers are much less durable, only having about a fraction of the armor and shields that the Apocrypha Cruisers in VEGA Supply Raiders (40) has, making them much easier to destroy.
Their ECHO Rays are also much weaker, as such they are not as great a threat as the ones found in the (40).
Compared to the Rebel Supply Raiders (25), they are arguably more difficult because of their effectiveness against groups.
HOW TO COUNTER: It is recommended to utilize broadsword destroyers, as their firepower is sufficient to take out the cruisers here, however one should have their broads marked up at least to II before engaging. Do not bring longbow destroyers, they don't have the strength or durability to defeat this fleet.
RECOMMENDED STRATEGIES: (W.I.P)
Rebel Raiders (25)[ | ]
| “ | Revelation Cruisers protecting a valhalla carrier from harm, deliver the pain and take their Exodus Parts! | ” |
| — Strategy Guide Description |
Rebel Raiders (25) is a direct copy of the previous rebel raiders (15), simply with more powerful weaponry and shielding. However, the difference is significant, making close combat no longer viable.
Rebel Raiders (33)[ | ]
| “ | Powerful Revelations guiding a Valhalla to the nearest wormhole, intercept them and take their Revelation Materials for yourself! | ” |
| — Strategy Guide Description |
Same as lvl 25, but with more shields and more armor, and more powerful beam guns that can rip any ship that wanders too close. must be kited with ragnarok and battleships to minimise repair costs, main weakness however is stasis, so use stasis on them. Then after all the cruisers are dead, bum rush the carrier.
VEGA RAIDERS (40)[ | ]
| “ | VEGA Apocrypha Cruisers keep a ragnarok under heavy guard as it transports their cruiser materials. Invade and steal them! | ” |
| — Strategy Guide Description |
V-SEC RAIDERS (53)[ | ]
| “ | V-SEC's own Corinthian Cruisers protect a Valkyrie Carrier with their lives, assault their devotion and take the Corinthian Materials for yourself! | ” |
| — Strategy Guide Description |
Battalion Supply Runs[ | ]

Battalion supply runs are characterized by the image of a Zeal Battleship, making a retreat from a nearby main sequence star.
These supply runs are generally considered the easiest of the supply runs. Due to the fact that they can be kited just as effortlessly as the regular fleets can. The carrier however makes the use of only one ship rather inefficient.
These supply runs introduce a more powerful sector variant of the Rebel Battalion.
BATTALION-CLASS supply runs drop strongboxes for the Rancor Battleship, Venom Battleship, Fury Battleship, Dread Battleship, Zeal Battleship, Vigilante Battleship, and Hellfire Battleship.
Rebel Battalion (15)[ | ]
| “ | A fleet of Fury Battleships escort a lone Valhalla Carrier to deliver a cargo shipment. Change their plans and 'receive' the rancor materials instead! | ” |
| — Strategy Guide Description |
Rebel Battalion (25)[ | ]
| “ | A group of Fury Battleships provide cover to a Valhalla Carrier. Take them out and obtain the venom materials! | ” |
| — Strategy Guide Description |
Rebel Battalion (33)[ | ]
| “ | A Battalion of Fury Battleships keep close to their Valhalla Carrier, not allowing any to threaten it. Become the one exception and take the fury materials! | ” |
| — Strategy Guide Description |
VEGA Battalion (40)[ | ]
| “ | A fearsome battalion of Dread Battleships protect a Ragnarok Carrier with their immense armaments. Outperform them and raid the dread materials! | ” |
| — Strategy Guide Description |
Vsec Battalion (53)[ | ]
Hunter Supply Runs[ | ]

Hunter supply runs are characterized by the image of a Komodo Cutter, leaving a nearby planets orbit.
These supply runs are the more difficult ones to accomplish, due to cutters being nearly inescapable, and dishing out high damage with burst rays. They also come with a pair of faction specific battleships which render utilizing cruisers as a direct counter difficult.
Hunter supply runs introduce several new fleets, including the Rebel Hunters, VEGA Hunters, and V-Sec Hunters. Which utilize their faction specific hulls and technology.
HUNTER-CLASS supply runs drop strongboxes for the Taipan Cutter, Gharial Cutter, Komodo Cutter, Python Cutter, and Basilisk Cutter.
Unlike the other supply run types, hunter supply runs only go down to level 33.
Rebel Hunters (33)[ | ]
| “ | A swarm of Taipan Cutters front-run any opposition to defend their Valhalla Carrier. Hold them off and take the taipan materials! | ” |
| — Strategy Guide Description |
VEGA Hunters (40)[ | ]
Vsec Hunters (53)[ | ]
Iron Star Deserters[ | ]
| “ | An ISC Hunter Fleet which has deserted it's brethren in favor of servitude to VEGA. Proceed with caution. | ” |
| — Strategy Guide Description |
Iron Star Vanguard[ | ]
| “ | An ISC forefront regiment designed to lead the charge in all-out war. Distance must be kept from the opposition at all times. | ” |
| — Strategy Guide Description |
Demon Corps Contingent[ | ]
| “ | A fleet of loyal Demon Corps and Vsec pilots who have taken up arms to hunt down the rebellion. Extreme caution is advised. | ” |
| — Strategy Guide Description |